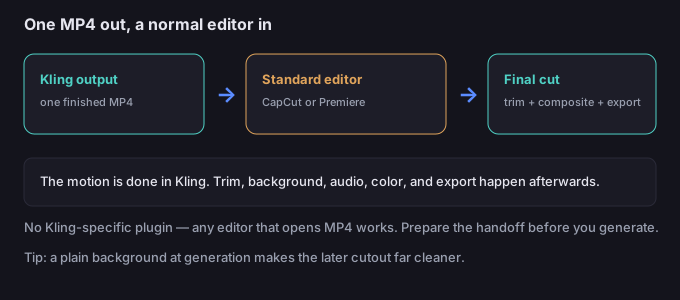
A Kling Motion Control clip is a destination, not the final cut. It nails the motion, but it leaves the editing to you: trimming, background, audio, and color all happen afterwards in a normal video editor. The good news is there is nothing exotic about the transfer — you get an MP4, you open it in whatever editor you already use. The skill is in planning the handoff so post-production is quick.
Why a second tool is needed
Kling's job stops at "a character performing the reference motion." It does not hand you a timeline, a multi-track audio mixer, or a background remover. So the unfinished business is:
- Trim the lead-in and tail where the motion hasn't started or has settled.
- Background — keep, replace, or remove it (the removal step is where a browser tool like this one helps).
- Audio — keep the reference sound, mute it, or lay your own track.
- Color and length — match a series, add titles, export for the platform.
None of that needs a Kling-specific plugin. Any editor that opens MP4 works.
CapCut vs Premiere for this job
| Need | CapCut | Premiere Pro |
|---|---|---|
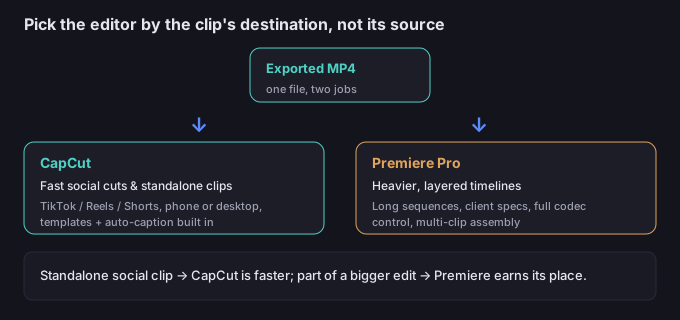
| Fast social cut (TikTok/Reels/Shorts) | Best fit — templates, auto-caption, phone or desktop | Overkill for a 15-second vertical |
| Multi-clip timeline with other footage | OK for a few clips | Better for long, layered sequences |
| Background removal / chroma key | Built-in cutout on some plans | Ultra Key / masks, more control |
| Team / client deliverables | Limited export control | Full codec and spec control |
| Learning curve | Gentle | Steeper |
Rule of thumb: if the clip is going straight to social and stands alone, CapCut is faster; if it's one piece of a bigger edit or needs precise spec, Premiere earns its place.
Prepare the handoff before you generate
Most post headaches are decided at generation time. Get these right and editing is trivial:
| If you plan to… | Do this at generation |
|---|---|
| Remove the background later | Pick a plain, evenly lit background (or green) so the cutout is clean |
| Keep the sound | Generate with audio kept; don't re-record in the editor if you don't have to |
| Mute and score | Mute at generation, then add music on a separate track |
| Cut to a beat | Keep the reference's own music so timing is already there |
| Composite onto new scenery | Hold a still frame at the end for an easy freeze, and avoid fast camera moves that are hard to match |
5-step post-edit workflow
- Export the MP4 from Kling. Download the file; that's your source clip.
- Import into your editor. CapCut or Premiere — drag the MP4 onto the timeline.
- Trim the dead frames. Cut the lead-in before motion starts and the tail after it settles; this alone makes it feel finished.
- Handle the background. If you need the subject isolated, run the clip through a background remover (the browser tool on this site exports a transparent WebM or PNG sequence) and drop the clean subject into your editor over a new scene.
- Fix audio, color, and export. Add or mute sound, match color to the rest of your series, then export at the platform's spec (vertical 1080×1920 for shorts, etc.).
5 failure modes (and the fixes)
| Failure | Why it happens | Fix |
|---|---|---|
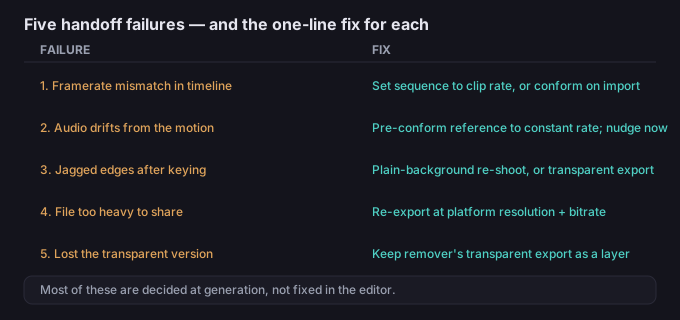
| Framerate mismatch in the timeline | Editor default differs from the clip's rate | Set the sequence to the clip's frame rate, or conform on import |
| Audio drifts from motion | Reference had variable frame rate | Re-encode the reference to constant frame rate before generating next time; nudge the clip now |
| Hard, jagged cut edges after keying | Busy or uneven background behind the subject | Re-shoot with a plain background, or use the rotoscoped/transparent export from a remover |
| File too heavy to share | Exported at full quality for a social clip | Re-export at the platform's resolution and bitrate; social doesn't need master quality |
| Lost the transparent version | Edited the flat MP4 instead of the isolated subject | Keep the transparent export from the remover as a separate source layer |
What to do when the motion is right but it needs a home
A good Kling clip is rarely the final post — it's the best part of it. Once the motion reads, the rest is assembly: trim it, place it over the background you actually want (using a transparent export so the edges stay clean), and let the editor handle pacing and sound. The tool on this site runs in your browser, so your video never leaves your device while you work — nothing is uploaded to a server, on either the Kling side or the editing side.
Common questions
Do I need a special plugin to move Kling into CapCut or Premiere?
No. Kling outputs a standard MP4; both editors import it directly. There is no Kling-specific bridge to install.
Which should I use?
CapCut for fast standalone social cuts; Premiere when the clip is part of a longer, layered, or spec-sensitive edit.
How do I get a transparent background for compositing?
Generate with a plain background, then run the clip through a background remover that exports transparent WebM or a PNG sequence, and bring that isolated subject into your editor.
Why does the audio drift after I cut it?
Usually a frame-rate mismatch between the clip and the sequence; set the sequence to match the clip, or pre-conform the reference to a constant frame rate next time.
Are my files uploaded when I edit them?
No. Anything you process with the tools on this page runs in your browser; we never receive your media.